Building a QR code generator web service with NodeJs and AWS Lambda
A cost-optimized scalable web service

I’ve been working with AWS services for a while and I got my cloud practitioner certificate 2 months ago, so I decided to build a personal project using only AWS as a cloud service.
The project we are about to build together is a QR code generator web application, in this first article we are gonna develop the backend part using AWS lambda, And in the next article we are gonna do the same thing for the frontend part. so let’s start building!
So first things first, after reading the title you may be already asking yourself why I choose AWS lambda over a classic ec2 instance (with NodeJs and Express framework)? the reason is simple :
- Minimal cost: we pay only for what we use, for example, if our function gets executed 1000 times we pay only (the price of lambda function execution) x 1000, contrary to EC2 where we would pay for the total servers running time.
- auto-scaling: In case the number of concurrent calls to our function increases consequently AWS will increase the number of servers to cover the demand, similarly if no one calls our lambda function AWS will scale down the number of servers running our function to 0.
If it is not clear to you, you may read my previous article about serverless architecture.
Let’s write the code
Our function is so simple, the input is a list of strings, and the output is a list of QR codes of those strings.
To generate the qr codes we are gonna use a javascript library called called “yaqrcode”, here is an example :
const qrcode = require('qrcode');
const base64Result = qrcode('hello world');
It wil generate a Base64 data URI like this:
data:image/gif;base64,R0lGODdhggCCAIAAAAAAAP///ywAAAAAggCCAAAC/4yPqcvtD6OctNqLs968+w+G4kiW5omm6sq27gvHEUDXto3gCc3wgQ+8+QxCYq13/AGMQ6WwOHk+c0kq0oh13qg6naK71HKl1Vn4ukuSy01ksC1WOoLWBnx+XsDB6zr+nccUdndAVxiYRgFouAYl2ETolcY3WAlYB0WIlmnZCLl16Ib42JlFiQmqqdfJmJpnKEgaq+UYt/eKKysXxVqp+5k1y7kIKowIHErry/tbunvrl9z3vCzVjAqm2GuqthwNrZxNTUocTC0uoXp5yGnePlnMXr2daDdqjzdLPj8GKy9pjBvAXWjSeeI3LmErbgwVIlwYbgovTw0hWnyIsWLGiP+1QKzTxxHhmIZ/cKli8THOPogjE5ZsSYLYQGyu1lFkpvJfr5lmVt4TWNPZTYMgm1nb4M9fQIJMl2osmlOptDLa3HmTR7KprVwObyGL5KzqVFFfuqFTZu6bWZMSwVr4em8gpaSuCm79dNTtxKu60rqsVwvvzng0xfEkqzXwMb5TJQn2qTdvWDNgIwc9BW8YW8FwgZ6Eh7is0aBlJXPezLXV4QqqF9tc3LIc1mRW92XV0Lq0UNizZYNE5rmbX4OY7Z496hNq8NXT3pLG1xv16eKAyZTsSFm4TtFou1t+DNohqr576cql9467Y6pbs7b+DAG7e+1Ah3tfCz+kVOc8zV//fS3Ka6v109ZPqww4VnW2RbXbeRflplV8hEEHjkyTCcieYbs5xVo8/pEnlWKmcSUhckh5+B9+qbnGhnUMEicRB2fV92Jj9DwV0YKYzbiXXxiqZcx6Gmm241r2SbgUeOAQuJyLQ6JXIG4bMsWjV9od1CKNRNJ3gW/3EWiiknXpJBtwOWHgZXr6ZRndcQW6CVOXb0o34XoiuqjXNQdOVuJzkLEIJp08WjXoXQZyF42WUYr3wIMsImgXkvXQpONG+XT1KHtEdfhOiFCKeWRmU+qZEowa+vgpW7fZUySTmIoFIG2yxmbkKoRmGGOEk+IUK6qIUTfedqKaGWlPZDpJJW+6/5lIq4WByofTn0LOqutQ4c3VorXOrfqhsIohKitLCu6aX7AVquotiuDW9lewQHK6qJ3oevreorfiCCmr8WY7L2MaTmPmqecc2iiy97ab45mvHuvquaEuW2e/qGqm3oW5qonjphbKG+h8WLJb5mDNGbsxvx3/hSVdwTU5MowHq9nquKdVHHCK+dLaLJcxm4sazSSiPGGfC667J9GeBhkxwLm6nDDRuhntb4NJ47l0weCW7POdYaobHciaRhuuyLyNbO23XSerXIdDh0Spru4a+nS6Zm/bNNs2Pgx0qQxiS2x2OMPdXcNXRt1ygnHyJzHg2FHM6LNf00sw4p952WTb0//yHbnbciJI+cCX16ootE6rndjgDpqsOcelK5qonBPPczqo+v7Ns8onniyutCn+FpeKra8tVqXcHuR130gbXzfTnx9eo5uMbzK414jzfnCcvSbM3JS2l+v5YGhexqaVK89ut8bgcy+42eJ3/1L5YDtvsfoqPr9n7GzSzSF1Wx8/53W4zl0eqr3rSZYjXNTad7P6CTBstVtR7tqzq7glsE+O6tSYsHW1MY3PdlISmNJI5TtyaZB9QKPbtFp3LmfZiHHT4dcEq9O3Jd2tbliDYHIY1oHvoIhZZ8ua9wAXNxn1bm2F41Bhfgis2XzvZajLmA1JGKsRiYl73VKdE+H0JQj/SrFfVDSY3SojkmRd5Fe4ol4A7VcogTFxVUjz2e8ykEJlheeGl9Lbx5SYw7GVsWjHmhzsMrU19PEqhKGhlhpLd702jgBD6tjj32JYq/Ul8I5q+dEM9yMqqFhwdAHy4hQtliSC0Q+EnLQVheLnJ1OiUGxxlODXitVA3L1ydTD0JJ+ASLILXsyR97nJ8uS2wC6C8E4ZxBz9/FOyB9ZRl3q7YvSEpadbARBWzLylM8Wltd318WfUPKR9UjIiRVZyj50znzerhcoi2bFnMguasYwzJ9F1r5EyrBfGwFbM881ShYWU3prw1skt5tOHvrqWO1cpz4DGU47niaYhCQmdk8lgHKIUrahFL4rRjGp0oxztqEc/CtKQinSkJD1AAQAAOw==
So to create our function we are gonna wrap the previous example inside the classic lambda function boilerplate, then we are gonna handle the fact that we should generate multiple QR codes, and finally add some error checks.
Here is our function code:
var qrcode = require('yaqrcode');

/**
* Generate qr codes from a list of strings (a qr code for each string)
*/
var qrcode = require('yaqrcode');

exports.handler = async (event) => {
  const requestBody = JSON.parse(event.body);

  if (event.httpMethod !== 'POST' || !requestBody.items) {
    return {
      statusCode: 400,
      headers: {
        "x-custom-header" : "alpha"
      },
      body: 'Malfofrmed request.'
    }
  }

   let responseBody = requestBody.items.map(e => ({
     item: e,
     qr: qrcode(e),
   }))

   let response = {
     statusCode: 200,
     headers: {
       "x-custom-header" : "alpha"
     },
     body: JSON.stringify(responseBody)
    };

    return response;
};
Creating Lambda function in AWS
It is simple we open our AWS console, and head to the lambda service, then we create our function.

After creating the lambda function. We should add a trigger to it so we can call it (the lambda function) later, in our context we’d like to call it via a URL so we are gonna create an API Gateway trigger.
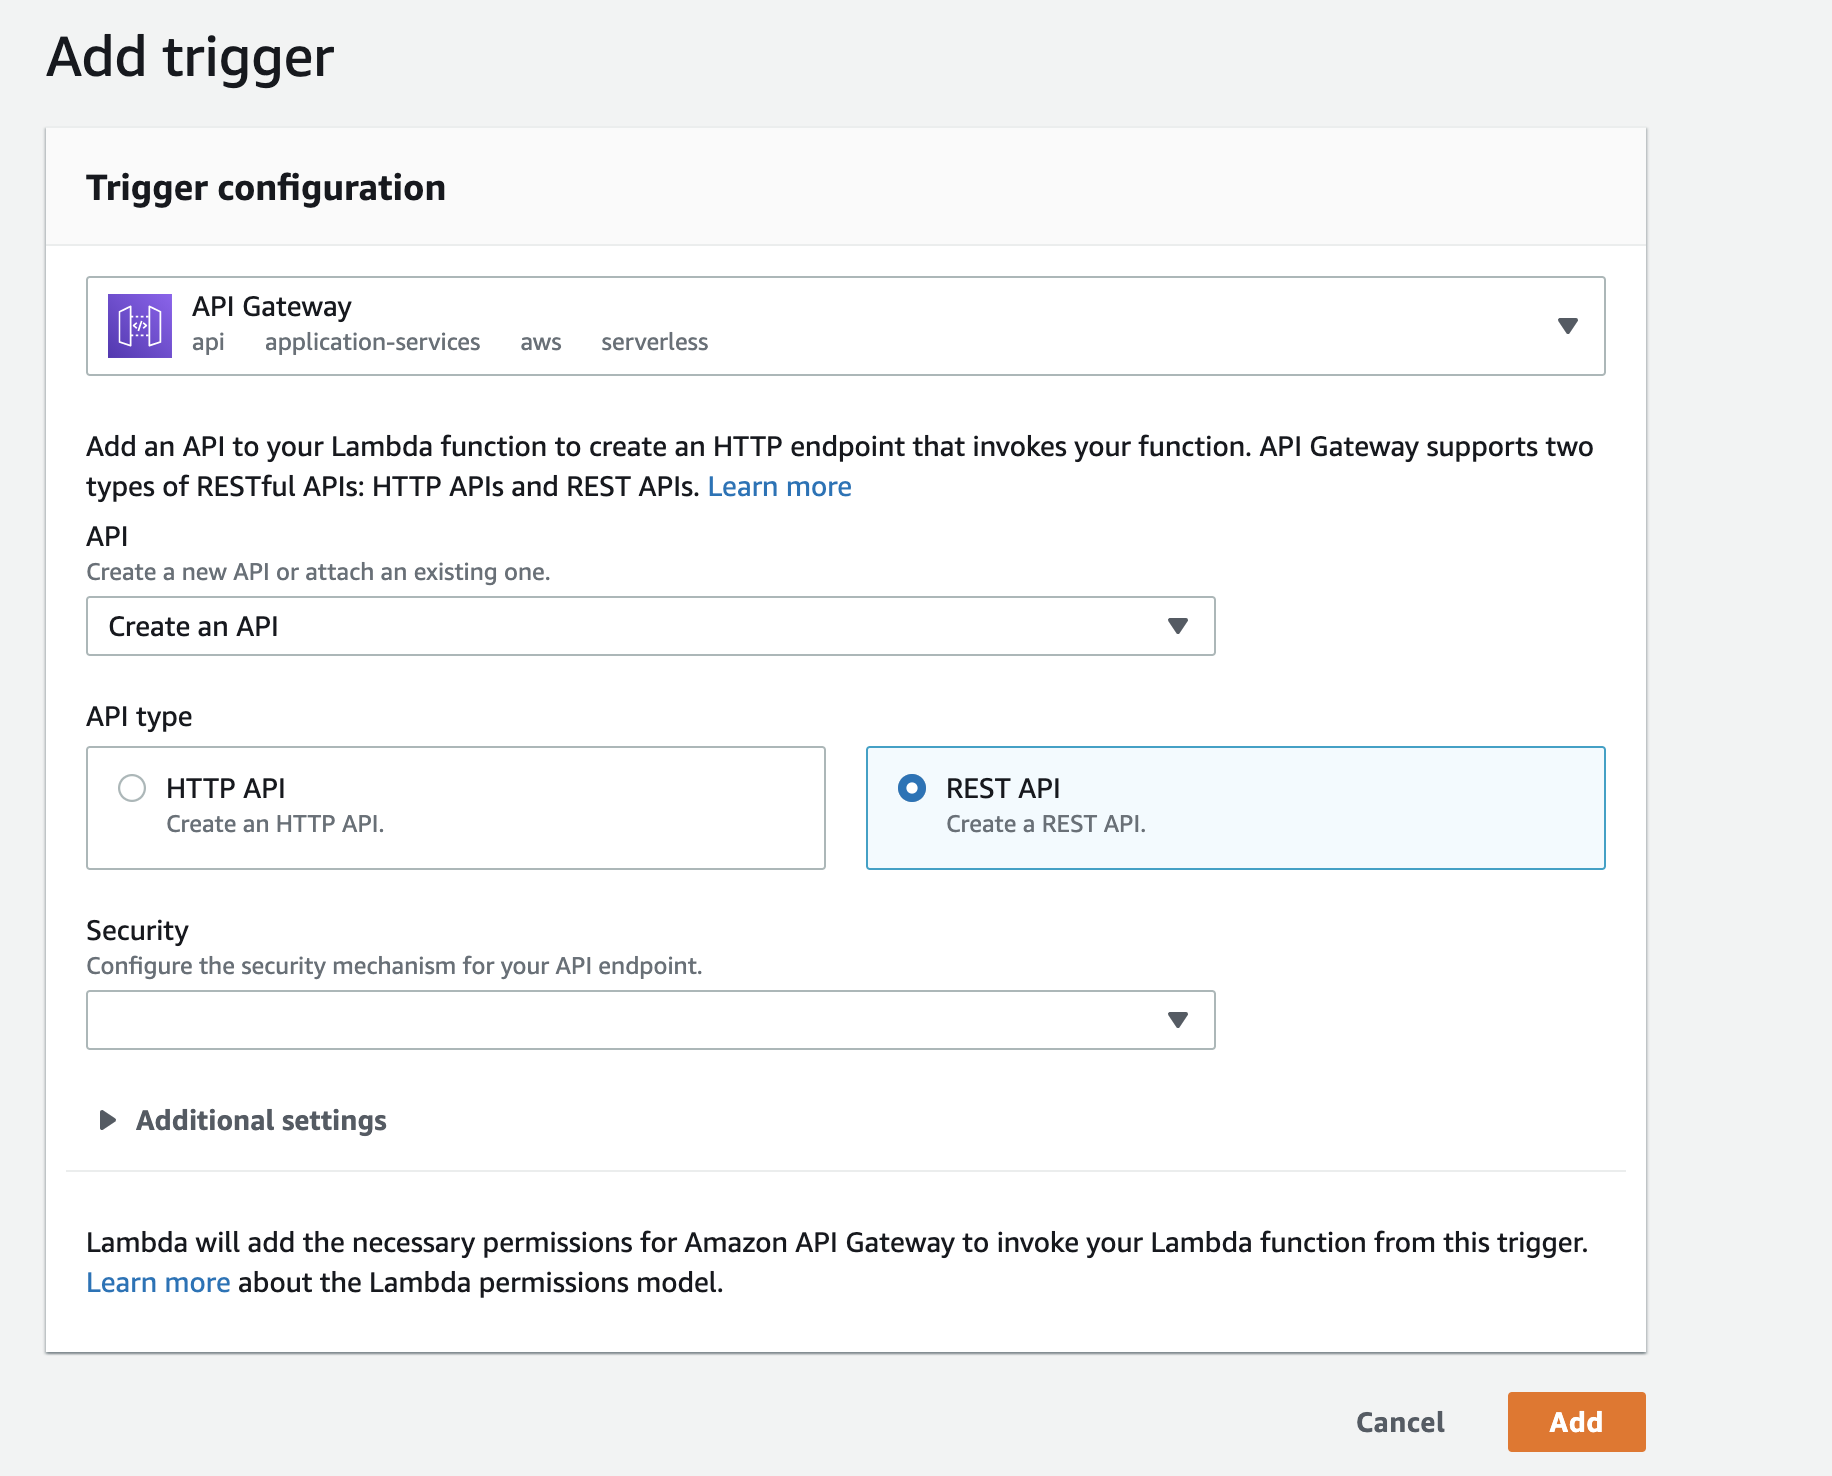
After creating our API Gateway, AWS generates an api url for us (https://xxxxxx.execute-api.us-west-2.amazonaws.com/xxxxxx) we are gonna use it later to call our function.

Auto deploy (Github to AWS)
First of all, I pushed the repository to GitHub, and I made it public so you can read the code. https://github.com/BenEddi/qr-node-lambda-generator
Now we need to plug our repository into AWS so each time we push a new version to the main branch, our Lambda function gets updated. for that, we are gonna use Github actions.
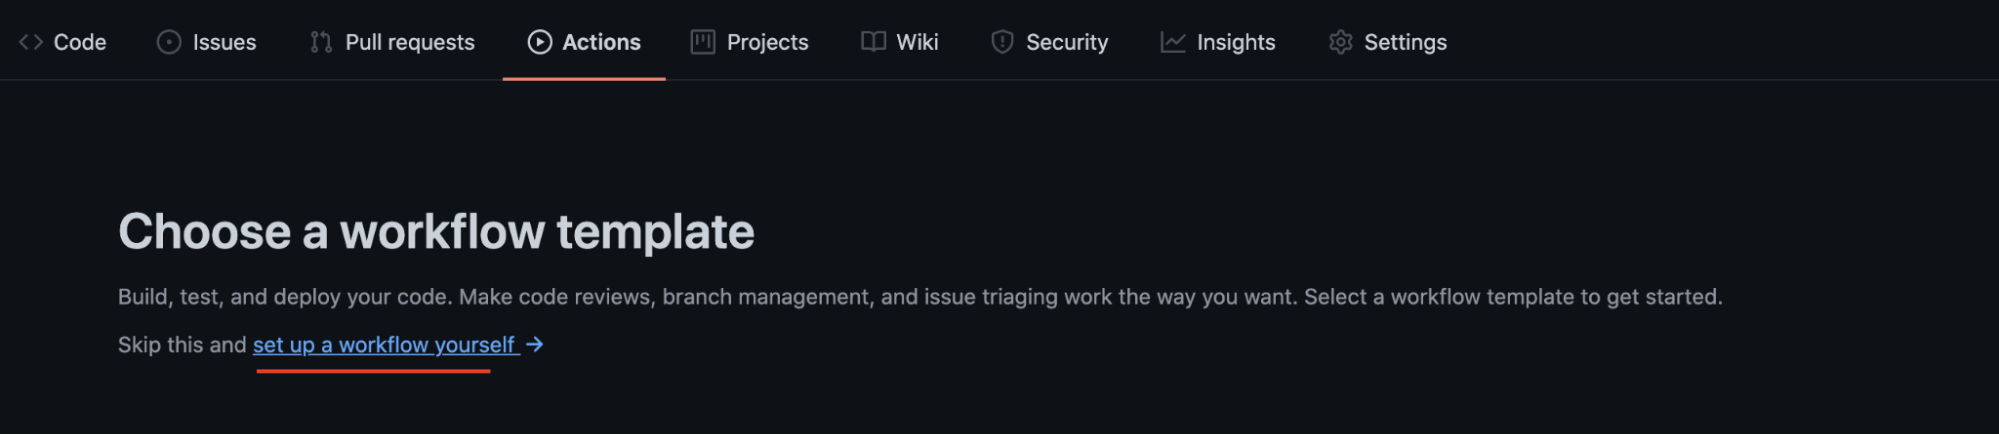
So we open the Actions tab.

On the Action page, there are is a list of pre-built workflows. No workflow does exactly what we wanna do, so we should press the “set up a workflow yourself” button to create our own workflow.
Now, GitHub generates a main.yml file for us, this file defines the workflow. it now contains a basic workflow to help us get started.
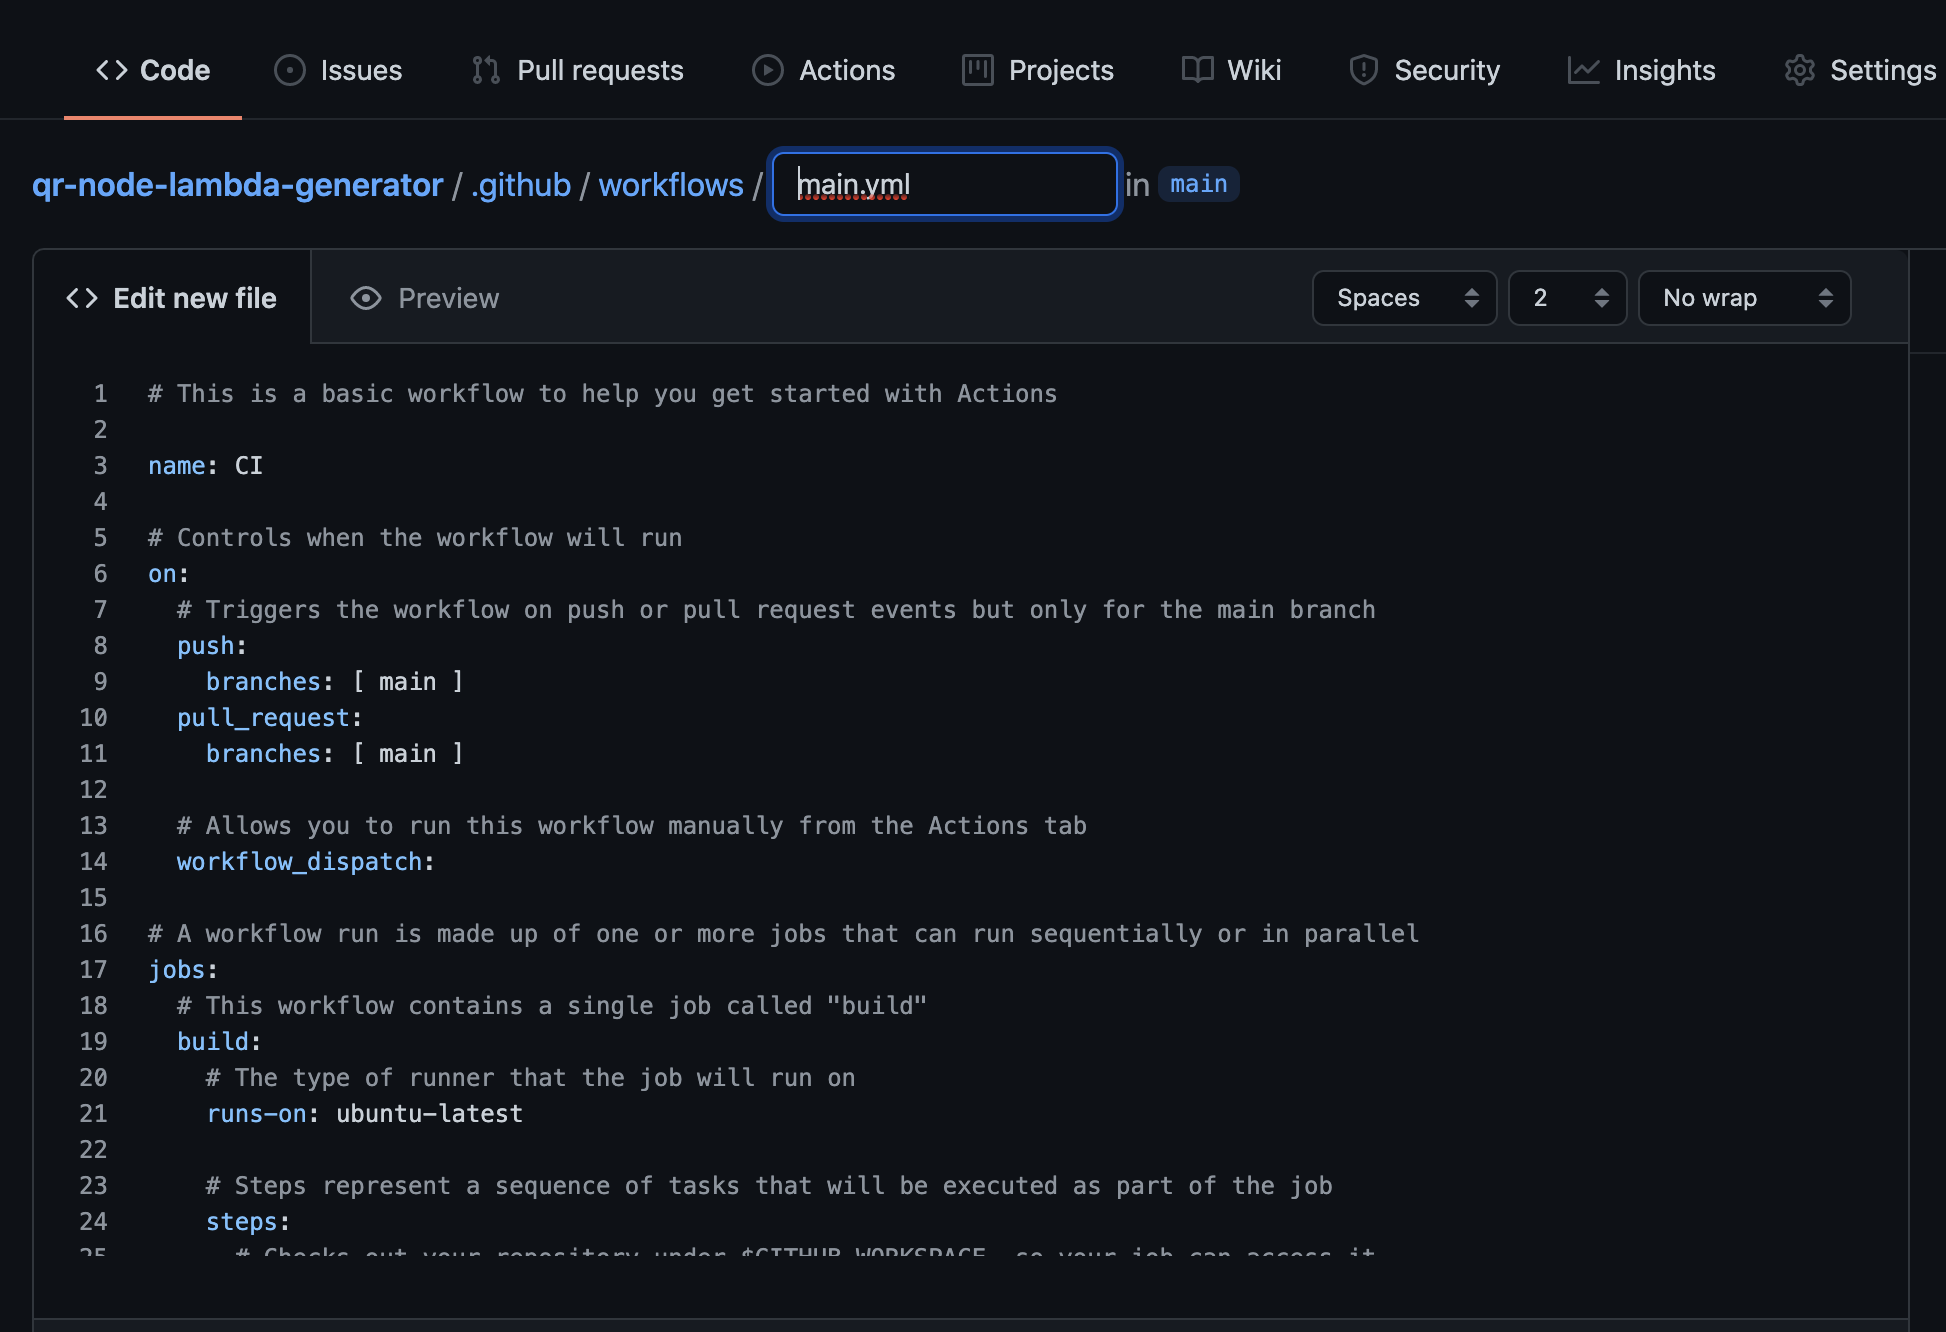
Now we are gonna remove the template code and replace it with the following snippet. (don’t worry I’ll explain what it does)
name: deploy to lambda
on: [push]
jobs:
  deploy_source:
    name: build and deploy lambda
    strategy:
      matrix:
        node-version: [14.x]
    runs-on: ubuntu-latest
    steps:
      - uses: actions/checkout@v1
      - name: Use Node.js ${{ matrix.node-version }}
        uses: actions/setup-node@v1
        with:
          node-version: ${{ matrix.node-version }}
      - name: npm install and build
        run: |
          npm ci
          npm run build --if-present
        env:
          CI: true
      - name: zip
        uses: montudor/action-zip@v0.1.0
        with:
          args: zip -qq -r ./bundle.zip ./
      - name: default deploy
        uses: appleboy/lambda-action@master
        with:
          aws_access_key_id: ${{ secrets.AWS_ACCESS_KEY_ID }}
          aws_secret_access_key: ${{ secrets.AWS_SECRET_ACCESS_KEY }}
          aws_region: us-west-2
          function_name: batch-qr
          zip_file: bundle.zip
First, we name our workflow. Next, we set our action to trigger every time we push with "on: [push]" . We only define one job called lambda ci and we set it to run on Node 14.x and ubuntu.
Next, we define the steps of the job. Each step starts either with a "uses:" or a "name:", There are 5 steps :
- "actions/checkout@v1" Checks out the code from a Github repo.
- "Use Node.js ${{ matrix.node-version }}": Installs node on the Ubuntu machine.
- "npm install and build": Downloads our dependencies and builds the code.
- "zip": zips down everything to a file called "bundle.zip"
- "default deploy deploy": bundle.zip to our Lambda function "qr-batch".
You may have noticed that we reference "secrets.AWS_ACCESS_KEY_ID" and "secrets.AWS_SECRET_ACCESS_KEY" in our code. Those are our AWS credentials so we don’t just hardcode them for obvious security reasons. But you can define them in your GitHub repo console. Just go to Settings->Secrets and then add the secrets there.
Testing it out
Now that we plugged our GitHub repo into our Aws lambda, let’s deploy our function and try it out!
To test a function we should send a post request using the url of our lambda function :
curl --location --request POST 'http://LINK_TO_YOUR_LAMBDA_FUNCTION' \ --header 'Content-Type: application/json' \ --data-raw '{ "items": [ "Hello world!", "Hakuna Matata" ] }'
Tada 🎉 ! it works!
For each item, we get a QR code back.
Summary
In this first part of the QR code project, we made a lambda function that generates qr codes and we set up a Github action to automatically deploy it to the cloud. in the next part, we are gonna develop the frontend part and deploy it to the cloud.